One of my Web Development goals for August is to get my feet wet by creating my own WordPress plugin. And because I like sharing (yes, I am good like that! 🙂 ), I thought let me share what I am learning regarding WordPress Plugin development with you all. If you like this article, let me know in the comments below and I promise I will be back with more. 🙂
In this first series, I am going to write about the first phase in WordPress Plugin Development – Definition Phase. This is what you do right after you have decided you want to create a WordPress Plugin.
Step #1 Understand Your WordPress Plugin Requirements
Always have a clear view of what you want the plugin in to do and how you will interact with it. I asked myself two key questions that helped:
a) What do I want my plugin to do?
b) How will I interact with my plugin?
Designing how you will use your plugin is as important as designing what your plugin will do. There are three key ways in which you can integrate your plugin to your WordPress website and interact with it.
- Shortcodes
- Widgets
- Meta Boxes
The method of integration is determined by when and/or how you want to use it.
Using Shortcodes
WordPress provides a Shortcode API which is a simple set of functions for creating “short cuts” for use in posts and pages. You can use the API to create content that can attached to WordPress pages.
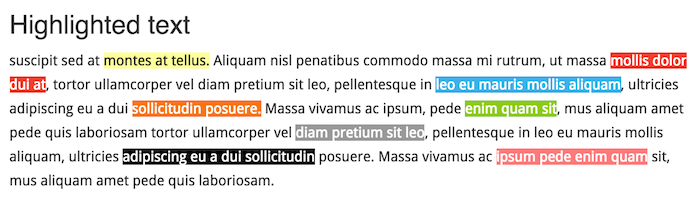
You can display text that looks awesome like this. I really love the concept of dropcaps. They add that refined touch to a bunch of text.
This is a very useful feature when you want to format the content of your article more than just bold, italics, underline and strikethrough.
I am currently using the theme Sahifa. One of the things I like about this theme is the amazing text formatting options it offers through shortcodes (see sample below)
You can also use shortcodes to insert specific content. This can be dynamic content like the 5 most recent articles you have published or static like a gallery of images.
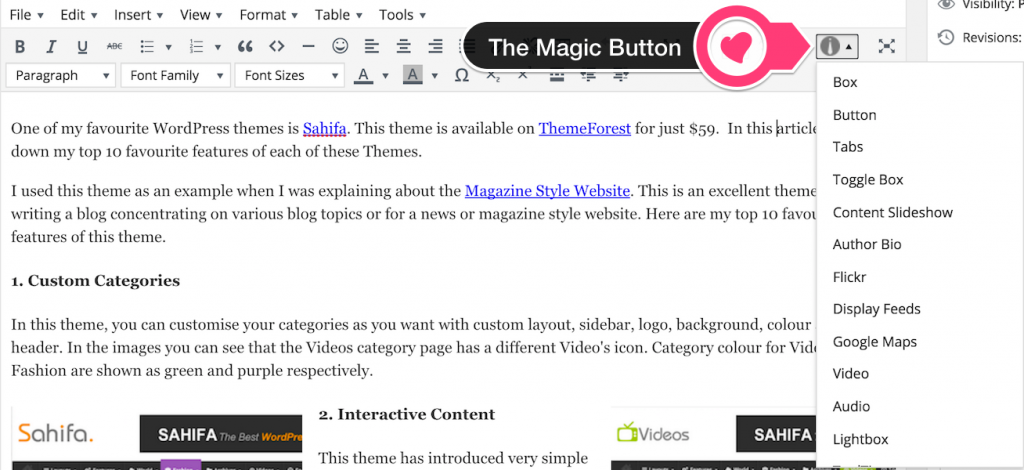
If you have too many shortcodes in your plugin, then you can even create a button in the TinyMCE editor using JavaScript. Here is an example of what is offered by Sahifa.
Using Widgets

You can use plugins to create “Widgets”. Widgets reside on your website sidebars or footer or even your WordPress dashboard.
There are a lot of default sidebar widgets that come with WordPress like Categories, Search and Tag Cloud. You can view the available widgets in the WordPress administration page under Appearance > Widgets (see picture).
Dashboard widgets are widgets that reside on the WordPress administration page. WordPress comes with a lot of inbuilt dashboard widgets like “At a Glance” and “Quick Draft”. These can help you as a website author to manage your website. WordPress has also provided the Dashboard Widget API to help its users create custom widgets for the dashboard.
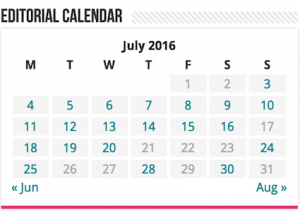
Widgets are very useful to display custom and interactive content which can be helpful for you as a website owner or for website visitors. For example, I have used the Calendar widget to show a mini month calendar. Every time I look at it, I get a sense of how consistently I have been publishing articles on my website. And my website visitors can use this handy widget to navigate to articles published on specific dates.
Using Meta Boxes
You can use a post meta box on the post editor screen to capture additional content either to be displayed on the website or to determine how the data is displayed.

A good example of a meta box that comes with WordPress is the “Featured Image” meta box. You can use this meta box to set a featured image for your article. You can create similar meta boxes to include specific featured images for sharing on social media websites.
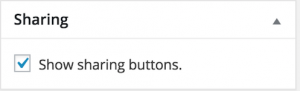
Another example is the “Sharing” meta box. Using this meta box, you can decide if you want to show the social share buttons at the end of your article. You can create a similar meta box to mark an article as “featured” so it can appear at the top of your website homepage.
Use Them All
You don’t have to design your plugin to use only one method of interaction. Yes, you can use them all! Lets say your are developing a WordPress website for movie reviews. You can use:
- a shortcode to insert a “star rating” anywhere in the review post
- a widget that acts as a slider showing the 5 most recently reviewed movies
- a meta boxes that can capture the genre, release year and director’s name which can then be used to organise your reviews on your website
The key is depending on which method of interaction you use, you will be using different APIs and functions provided by WordPress.
- Dropcap (like that “M” above)
- Tooltip for definitions and abbreviations
- Message boxes (like this yellow one)
- Toggle that will help my website visitors display and hide content
- Tab that will help my website visitors switch between various contents
Considering that all of my requirements are specific to text formatting which I will only use while I am writing an article, I am going to use shortcodes with a button for the TinyMCE editor.
Step #2 Choose a WordPress Plugin Name
Here are 3 things to remember when you choose a plugin name. Keep your plugin name
- Simple: Keep your plugins names simple with no special characters.
- Descriptive: I said simple, not silly. So don’t go for xyz or abc. Go for something that makes sense, because once you have a bunch of plugins, you will forget what is what.
- Unique: All WordPress plugins exist in the same folder. If your plugin file name is too generic, you are going to “bump” into another with the same name. And let me tell you – that is going to be more awkward than bumping into a lady with the same dress as you at the supermarket.
For my example, I am going to be creating a plugin that helps me format content. You will know what I am talking about as you go on.
I am calling my plugin – sony-posh-content – because I am going to make my content look “posh” through these 5 features.
Step #3 Setup Files and Folders
Plugins always reside in the wp-content/plugins/ folder. Under plugins folder, create a folder “plugin-name”. In my case, I created a folder called “sony-posh-content”.
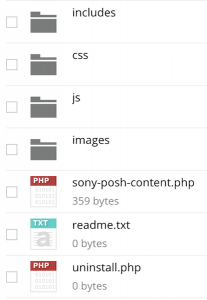
Then I went about creating a bunch of files and folders.
Here is what these files mean:
- sony-posh-content.php (this is the main PHP file for my plugin)
- /includes (for other PHP files)
- /css (for my CSS files)
- /js (for my JavaScript files)
- /images (for my images files)
- uninstall.php (for uninstalling my plugin)
- readme.txt (an overview file about my plugin)
Don’t worry about the contents of these yet. I will be telling you more about these in my subsequent articles.
Step #4 Create your WordPress Plugin Header
Every WordPress plugin must have a plugin header. You need to add it at the top of the main PHP file (the one with the plugin name as the filename). WordPress has defined how your plugin header should look like and here is an example from the WordPress codex page:
 /*

Plugin Name: Health Check

Plugin URI: https://wordpress.org/plugins/health-check/

Description: Checks the health of your WordPress install

Version: 0.1.0

Author: The Health Check Team

Author URI: http://health-check-team.example.com

Text Domain: health-check

Domain Path: /languages

License: GPLv2+

License URI: http://www.gnu.org/licenses/gpl-2.0.txt

*/
If you are developing a plugin to release to the public, then those last two lines with regards to the license is a must-have. GPL-2.0 is a very popular open source license that ascertains that there is no warranty this protecting the developer from liability if someone claims that the plugin destroyed one’s website. Also, it is worth noting that WordPress plugin can be released with a GPL compatible license only. You can put a price on it, but if released the source code should be made visible to the purchaser and they should be free to make further changes to it.
Here is what I have written down for my Plugin header
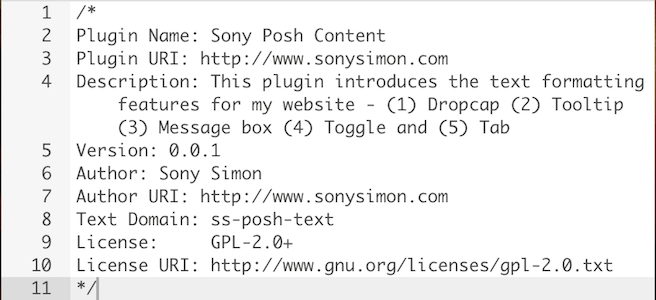
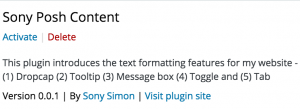
And this is what it looks like under the Plugin list.
BOOKS THAT HELPED
Two books that helped with my journey are:
- WordPress Plugin Development – Getting Started
- Using Hooks & Shortcodes in WordPress Plugin
- How to create TinyMCE Editor Buttons for your Plugin?
Thank you. I created my first ever WordPress plugin with the help of your article. Can you please also do some videos?
I created my first WordPress plugin with the help of the 3 articles. Can you also share how I can create a dropdown with multiple shortcodes? Also can you put a video? I think that will be useful.
I do have plans to do a full video. I was going through some tech changes at home. So you will see more videos in the coming year. 🙂