Nearly a decade ago, when I was doing a pet project using PHP/MySQL, I struggled a lot setting up my local development environment. Things have changed since then and the whole suite of required tools now arrive bundled and in easy-to-install packages. You can set up a local WordPress development site in just 3-steps. Let me show you how.
Step 1: Setup an AMP stack
A typical web application stack will contain an operating system, web server, database and programming language. For WordPress development, we need an AMP stack.
Depending on your operating system various prepackaged AMP stacks are available. If you are using Mac, I recommend MAMP and if you are using Windows, go for XAMPP. You can find more documentation on how to install, setup and use these on their respective websites (refer to FURTHER RESOURCES at the end of this article).
Step 2: Install WordPress
Installation of WordPress is an easy 5-minute process.
- Download the latest version of WordPress from here – https://wordpress.org/download/. Unzip it and you should have a wordpress folder with all the files in it. (You can rename this folder, but for ease I am going to keep it as wordpress.) Place this folder in the web server directory.
Where do I place the wordpress folder? (click to view)
Where do I place the wordpress folder? (click to view)
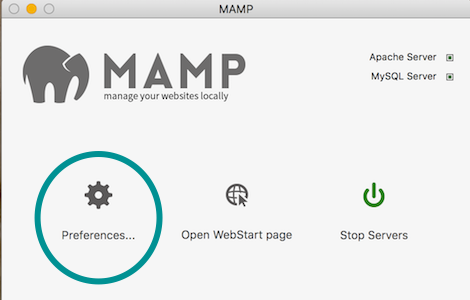
If using MAMP:
On MAMP Dashboard, click on Preferences. On the popup that opens up, click on Web Server. In there, click on the small arrow (as marked below). This will open up a folder. This is where you need to place your wordpress folder.

If using XAMPP:
Place it in C:/Program Files/XAMPP/htdocs if you have installed XAMPP in the default location.
- Using phpMyAdmin, create Database.
How to create a Database using phpMyAdmin? (click to view)
How to create a Database using phpMyAdmin? (click to view)
- Start servers in MAMP/XAMP
- Go to http://localhost:8888/phpMyAdmin (on MAMP) or http://localhost/phpMyAdmin (on XAMPP)
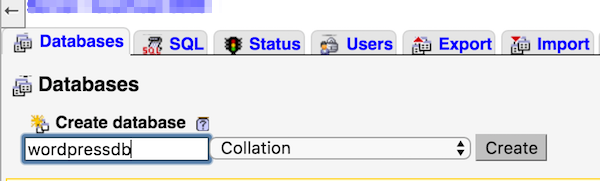
- Click on Databases tab
- Enter your database name (write this down) and click on Create (as shown below)
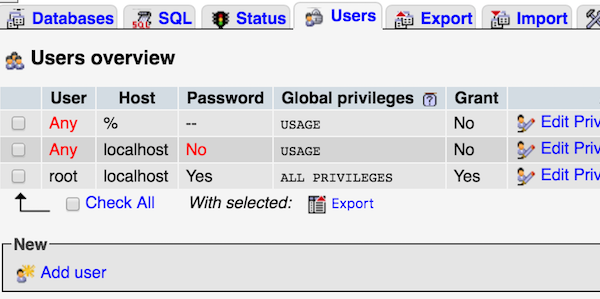
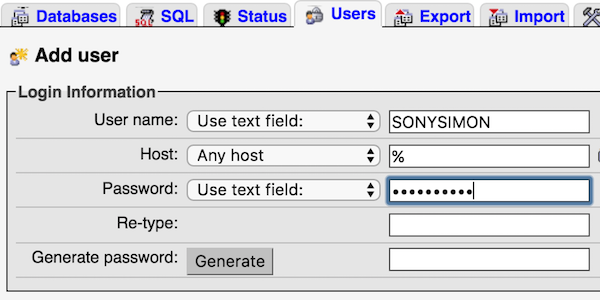
- Click on Users tab and then Add User. Enter a User name and Password and write these down (You can skip this step and use root as the username and password if you are using MAMP.)
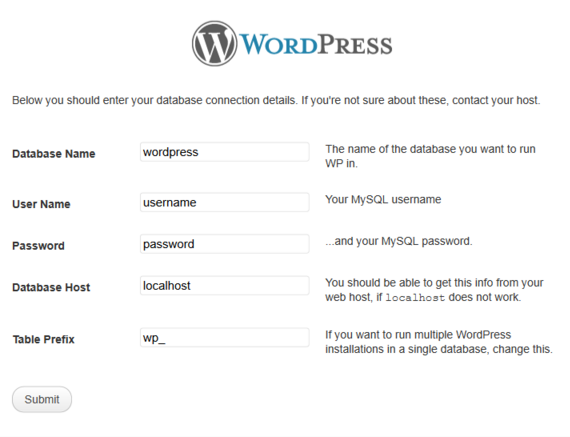
- Install WordPress by navigating to http://localhost:8888/wordpress/ (on MAMP) or http://localhost/wordpress/ (on XAMPP). When you arrive at the below screen, enter the Database Name, User Name and Password you wrote down earlier.
Step 3: Setup WordPress for Development
This is an optional step, but I highly recommend it.
- Run WordPress in Debug mode so you can see any errors in your theme or plugin.
define('WP_DEBUG', false );
to
define('WP_DEBUG', true );
- Install Plugins that help with the development. My top 5 recommendations are below:
- Developer
- Theme Check
- Debug Bar
- Log Deprecated Notices
- Query Monitor
I have included the links for these plugins at the end of this post
- Upload some Sample Data, especially if you are developing a theme. This will help with your testing of the theme and visualise the layout for various types of posts. I recommend the Theme Test Data from Automattic. You can view and download the data from here.
FURTHER RESOURCES
- MAMP Documentation
- XAMPP Forums
- Download MAMP
- Download XAMPP
- WordPress 5-minute Install
- Download latest version of WordPress
AMP AMP STACK DISCOVERY PHASE MAMP PHPMYADMIN PLUGINS THEME TEST DATA WORDPRESS WORDPRESS INSTALLATION XAMPP